Extending the Life of Your Decal Kit: Care Guide for High-Performance Vinyl
Categories: Maintenance, Tutorial, Expert Advice Target Audience: Motorcycle, Quad, and Jetski enthusiasts (high exposure to the elements)
Introduction: Sustainability Begins Now
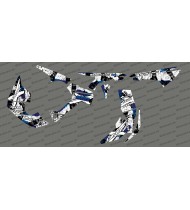
You've invested in a graphics kit to express the style of your machine, whether it's a quad for mud, a motorcycle for the track, or a jet ski for saltwater. Our kits are designed to withstand the elements, but the longevity of the vinyl, colors, and adhesion depends heavily on how well you care for them. Follow this simple guide to keep your graphics looking like new, season after season.
1. Cleaning: Mistakes to Avoid
Regular cleaning is key, but be careful with the method!
High-Pressure Jet: Friend or Foe?
Products to Avoid: Avoid harsh solvents, overly strong degreasers (such as petrol or acetone) and wax- or silicone oil-based cleaners, which can leave a greasy residue that is difficult to remove if you need to make repairs.
Opt for a mild soap: Use lukewarm water and a pH-neutral soap (such as car shampoo or diluted dish soap). Gently scrub with a sponge or microfiber cloth, especially on heavily soiled areas (dried mud, insects).
2. Drying and UV Protection
UV rays are the main enemy of vinyl colour.
Natural Drying vs. Blower: After washing, allow to air dry or use a blower (without contact) to remove water from edges and crevices. Do not expose the freshly washed vehicle to direct sunlight to avoid water spots.
Protection: Although our vinyls are UV resistant, applying a specific UV protection spray for vinyls once or twice a year can prolong the vibrancy of the colors, especially for machines stored outdoors.
3. Repairs and Salvage
Even the most robust kit can suffer a snag.
Lifting Edges: If a corner starts to peel, clean and dry the area, then use a heat gun or hairdryer (low setting) to slightly soften the vinyl. Press firmly with a cloth to reattach it. The heat will slightly reactivate the adhesive.
Minor Scratches: Minor scratches are inevitable. If the protective coating is intact, a simple cleaning may suffice. If the scratch is deep, it is best to contact our support team to order a replacement part.